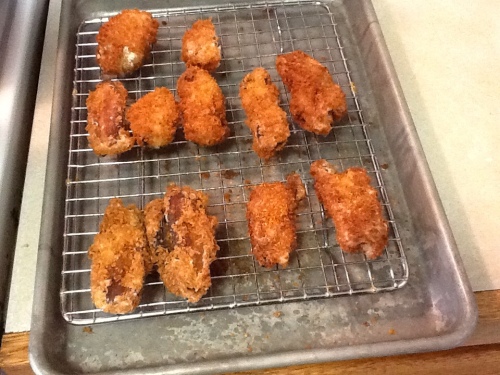
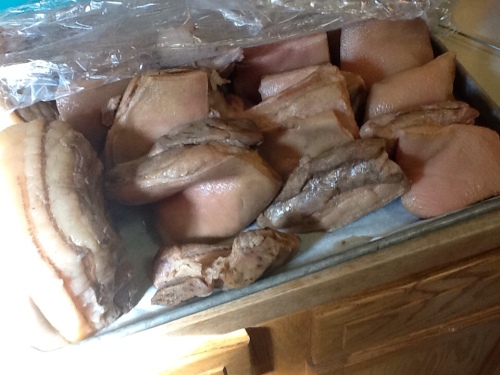
It’s been a crazy weekend of preparing for The Houston Beer Experiment. I’ve been playing around excessively with pork bellies and my new FreshMealsMagic sous vide kit. The event was great and I thoroughly enjoyed interacting with some amazing people and cooks. Furthermore, being in my element cooking and serving up food made me feel alive. It’s quite a great way to spend a Sunday.
My dish, fried pork belly, came in second. While it would’ve been real nice to take home the win and fly to Brooklyn, the whole process of coming up with this dish was a fun thought exercise into cooking.
Anyway, here’s some detail to my second place Fried Pork Beer Belly, explaining why I did what I did.
Step 1: Jaccard
The Jaccard is a device that tenderizes by making rows piercings into the meat. I recall reading a thread on egullet about it a while ago and was intrigued. Pork belly is a fairly tough cut of meat and “jaccarding” it would perhaps make it tenderer. Furthermore, the incisions would help with marinade penetration to give the meat more flavor.
Step 2: Brine
One of the stipulations to the contest was to use a form of beer so I went with hard apple cider in my brine. The rationale – pork and apples go together, as do pork and beer. Why not just use hard apple cider? (Honestly, it might be gimmicky. Regular apple cider might work just as well.) I brined the meat in a 4% brine for 12 hours. I also added 2% of the liquid weight in molasses to add color and to balance out the salt. Lastly, a few drops of liquid smoke were added for good measure.
A brief explanation on why brines work can be found here.
Step 3: Cook at 60C/140F for 50 hours
This step sounds excessive but it’s rather painless. After brining, I placed the pork bellies in Ziploc bags with a splash of apple cider. Everything was then out into a cooler filled with water with my nifty FMM heater to keep it at 60C.
Why 50 hours? Cooking the meat till 60C keeps the lean muscles moist and does make it ok to eat. However, some of the fatty tissues take a little more coaxing to really break down and tenderize. The Modernist Cuisine recommended a 24-72 hour cook time. I’ve sampled sous vide bellies at 12, 24 and 36 hours and the fat still came up a little tough so I just went with 50.
If you can’t afford to do this step, just put a whole bunch of pork bellies in crock pot, fill it up with liquid (water or apple juice is fine) and let it cook on low slightly uncovered. Once it gets to a boil, switch it down to the warm setting and let it ride till it’s soft (6-8 hours). It’ll still be good.
Step 4: Chill
When done with sous vide, remove the pork from the bags and chill, reserving the liquid for the sauce.
Chilling may seem somewhat redundant but it makes life so much easier. Ever handled a piece of warm butter? Warm pork fat feels that way too.
It’s also important to drain any cooking juices before chilling the pork as you want to ensure that the pork pieces are fairly dry on the surface when frying. You’ll thank me later for this. The juices will coagulate around the meat when chilled making them harder to remove.
Step 5: Fry
Along with testing out cooking times, I spent quite a bit of time toying around the frying bit too. I tested a hard cider batter which gave a really good apple aroma. Unfortunately, the batter couldn’t stay crunchy over time, which was not ideal since my dish had to hold for at least 3 hours. As such, I went for the regular dry-wet-dry breading method.
Fat
Corn oil tends to be the most suitable oil for my deep frying purpose. It’s readily available, economical and tastes rather neutral. For some reason, corn oil doesn’t absorb as much into the food once it’s removed from the fryer too.
Dry Coating
The dry coating gives the wet coating and breading something to stick to. I tried corn starch, tapioca flour and all-purpose wheat flour. I liked the results of corn starch the best and tapioca flour the least. But AP flour was readily available in my pantry so that’s what stuck.
Wet Coating
I normally use whole eggs but I found out that beaten egg whites gave a better result. Egg yolks made the final product a more ‘eggy’ and harder product than I would have liked. Beating the egg whites to stiff peaks made for a really fluffy coating. However, it was a nightmare when working with hundreds of pieces of pork belly.
Breadcrumbs
Panko breadcrumbs. That stuff is amazing. It’s crisp and stays crisp. It works so well I didn’t even bother considering an alternative.
Temperature
Since the pork bellies were in small pieces and were already cooked, I fried them at a high temperature of 215C (~420F) for a couple of minutes till golden.
Oh, and when frying, wear pants.

